Home Bar Equipment
Hello and welcome to Foxtail Apothecary; a blog about what makes a bar a bar and how to make the most of a bar in any setting. My name is Steve, I spent a number of years as a bartender and beverage manager at a high-end whiskey and cocktail bar as well as a bartender at a high-volume beer-focused pub and bottle shop. In addition to this, I have spent time working as a beverage manager at a Brazilian Steakhouse with a heavy focus on wine and have experience in liquor and wine retail. Otherwise, I am an enthusiast of drink and bar culture and am looking forward to sharing this journey with you as we explore different concepts of the beverage world at large.
Today we will be looking particularly at the home bar and its essential equipment. The home bar can mean a lot of things, it can be a collection of bottles on a laminate countertop or a high-end selection of obscure bottles and esoteric literature in a granite-topped wet bar. What we will be discussing is what constitutes a home bar and what are the essentials to make it functional.
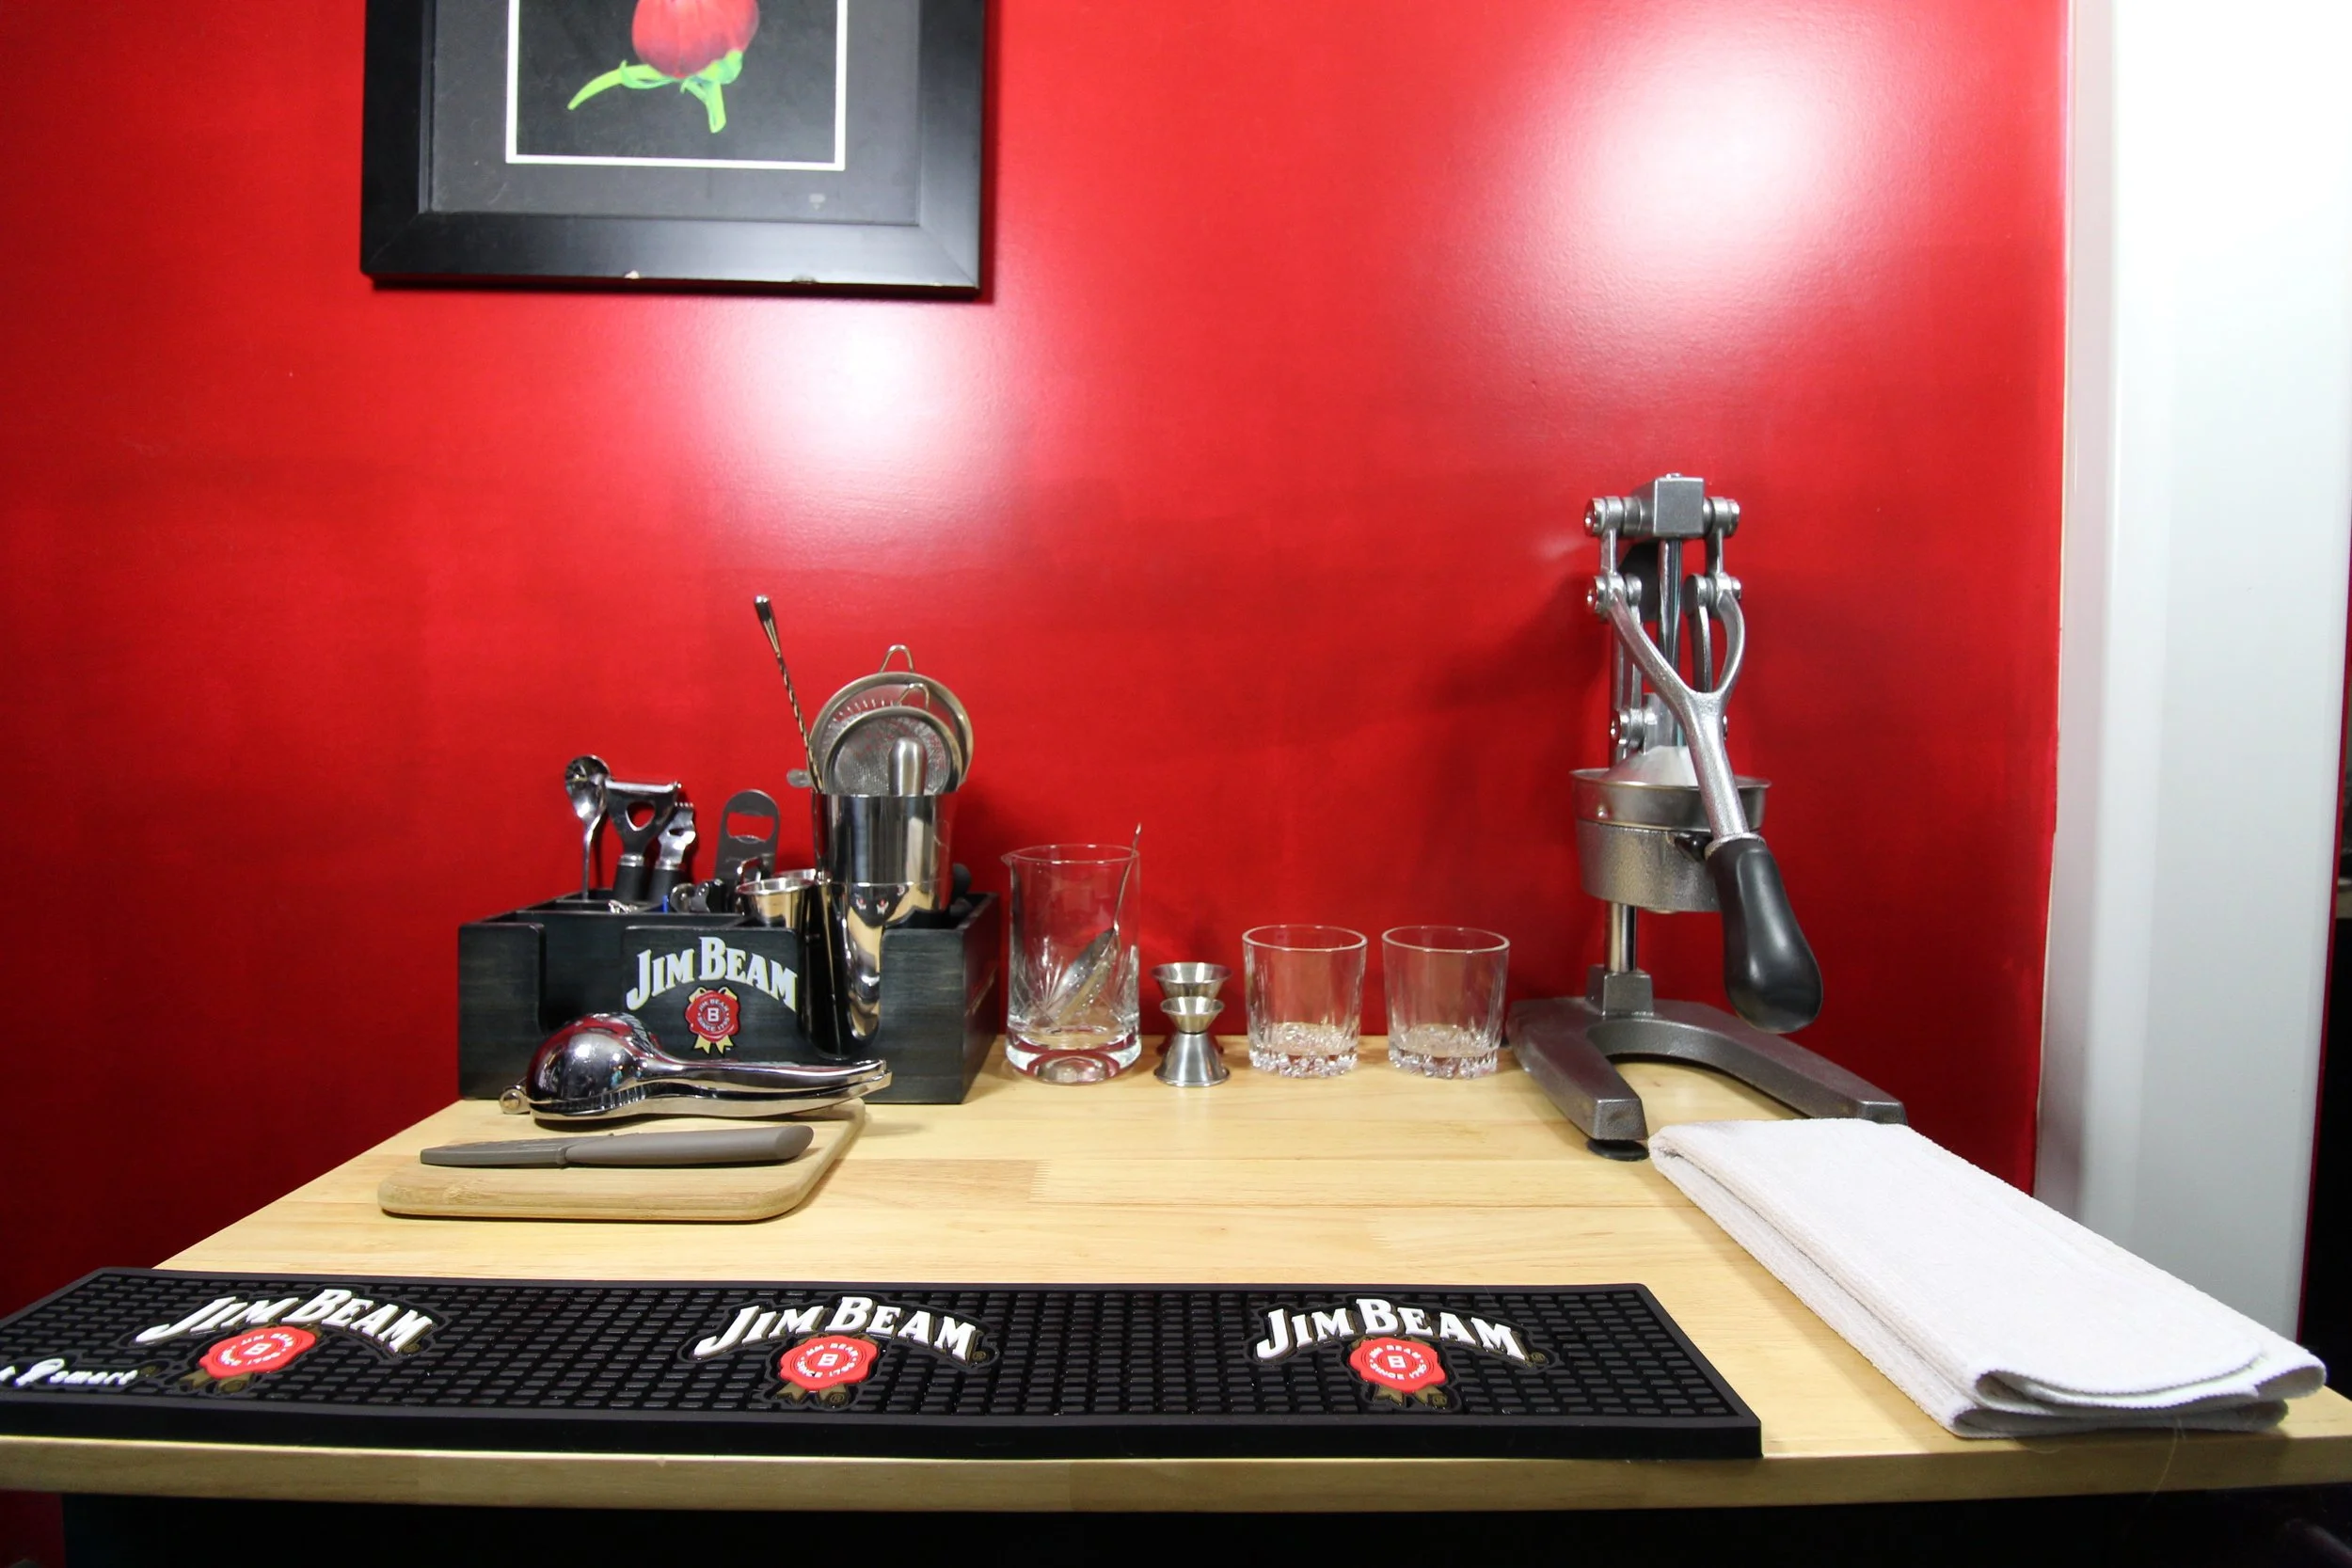
An inexpensive and compact kitchen option; my bar cart.
To me, a home bar is a place where you can safely and consistently store bar equipment and alcohol to make drinks for yourself and others. It should be a dedicated and reasonably self-contained space that can accomplish this purpose. This could be as extravagant as a full wet bar in an entertainment room in the basement or as simple as a small bar cart in a corner of the kitchen as long as it can contain your equipment and provide you with sufficient workspace. In my home, I use a bar cart that remains in my kitchen which contains all of my equipment and some glassware. The best option is the option that works efficiently in your available space and within your available budget. A major factor in how your setup works for your space will depend on your equipment. With that said; what do you need?
The various types of “jigger”. Japanese (left), handled (center), and traditional (right).
Making drinks starts very simply and depends very much on what you want to make. For the purposes of this post, we are going to focus on making cocktails, primarily with a focus on common and classic cocktails. No matter the cocktail, however, you need to have a measuring device. A measuring device means consistency and precision which is the basis of a good drink. The most common measuring device is known as a “jigger”. Jiggers are typically double-sided measuring cups that come in standard sizes in either metric or imperial measurements. Jiggers come in various formats. Traditional American and European jiggers tend to be fairly short and with wide mouths, but there is also the Japanese style jigger which tends to be taller and skinnier with a narrower mouth making it easier to use without spilling. The Japanese style jigger is my preference from both a storage and ease of use standpoint, I also prefer it aesthetically. There is a third type of jigger which you may not see frequently in a professional setting but it can be nice to have at home. This is a jigger with a handle, these are nice to have because they can be balanced on a vessel and any spillage is kept in the glass/shaker without it coming into contact with your fingers.
Boston Shaker (left), Mixing Glass (center), Three Piece Shaker (right)
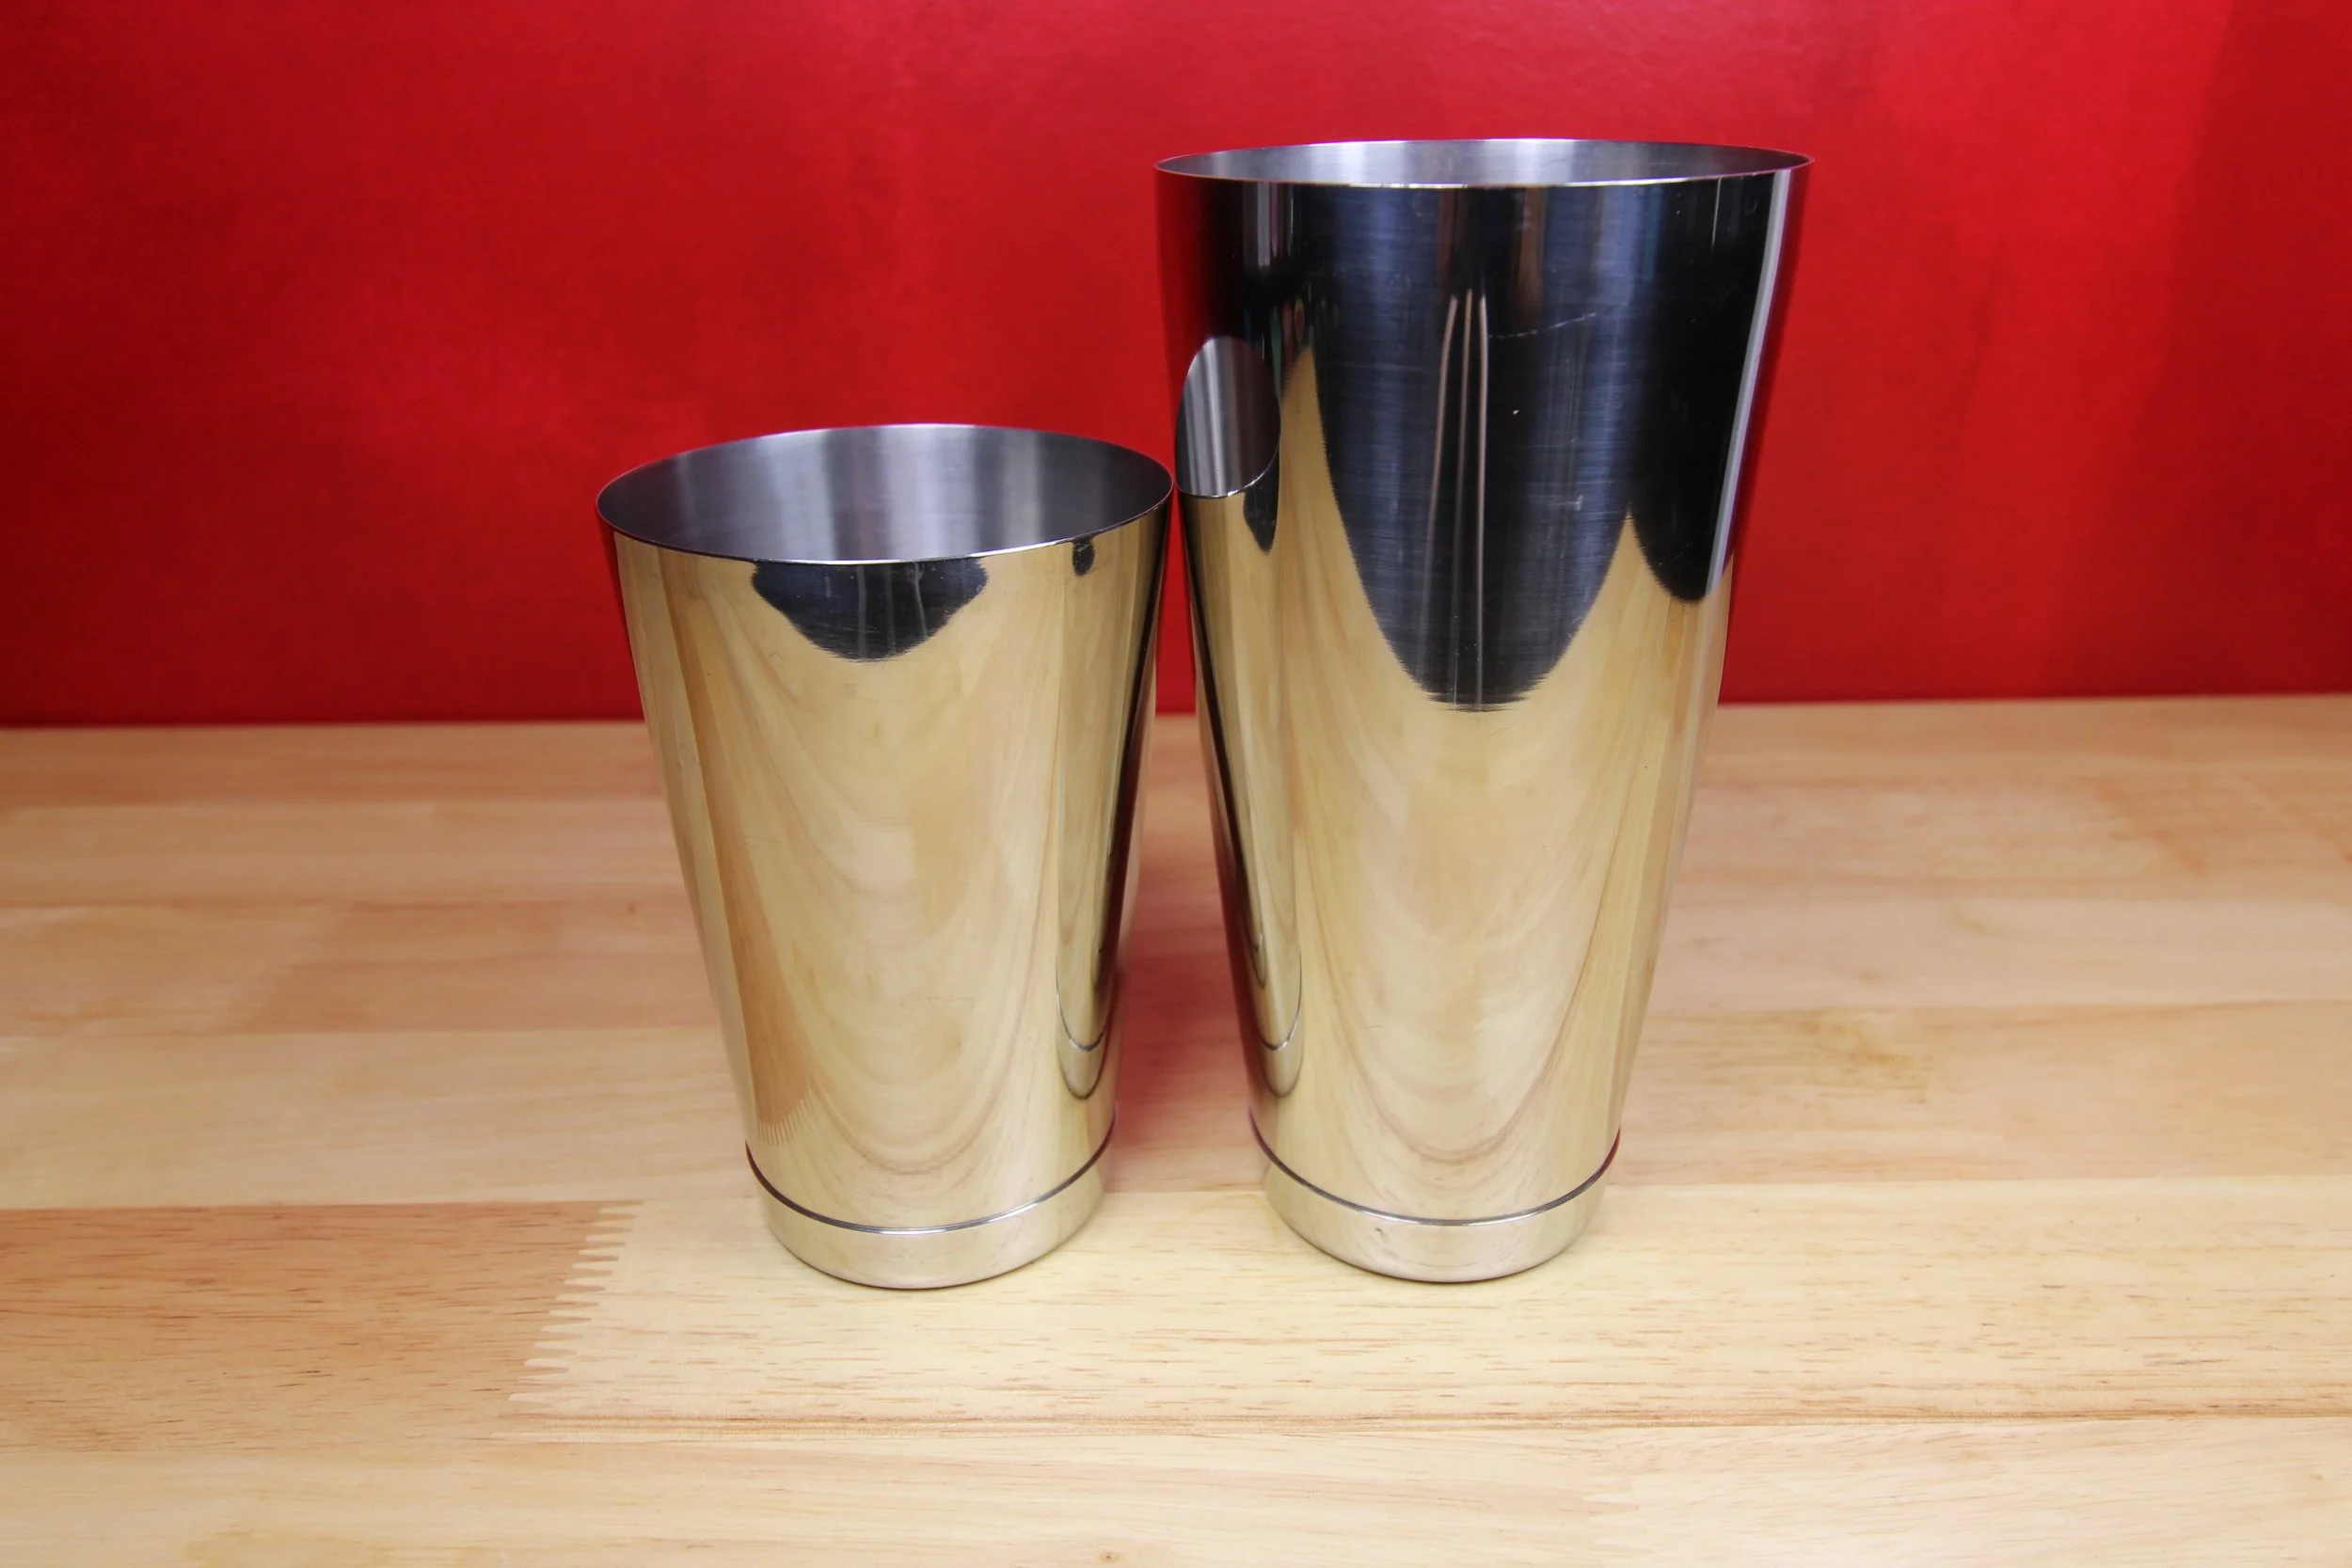
The next item you need is a vessel in which to mix your cocktail. There are a number of vessel options you can use. The least expensive and most versatile is a shaker. Shakers are typically metal but can be glass and there are two major types: Boston and three-piece. Regardless of your choice, both can be used to shake or stir cocktails. The most user-friendly option is a stainless steel three-piece shaker which consists of a main vessel, or tin, a tight-fitting lid with an integrated strainer, and an equally tight-fitting cap for the strainer. This option is desirable because all of the pieces fit together snugly and hold well while shaking with two hands requiring minimal effort. Boston-style shakers, on the other hand, are comprised of two separate vessels, or tins, of varying size, they can also be one tin and a pint glass. This option can require a little bit more effort and technique as you will need to forcefully seat the two sections together to prevent leakage or splatter while shaking. I prefer the Boston style because it is easier to clean and is comprised of pieces that are easier to store in my bar cart. Keep in mind that, while there are methods to pour/strain cocktails using just the two tins you will want to have a separate strainer if you choose to go with a Boston shaker.
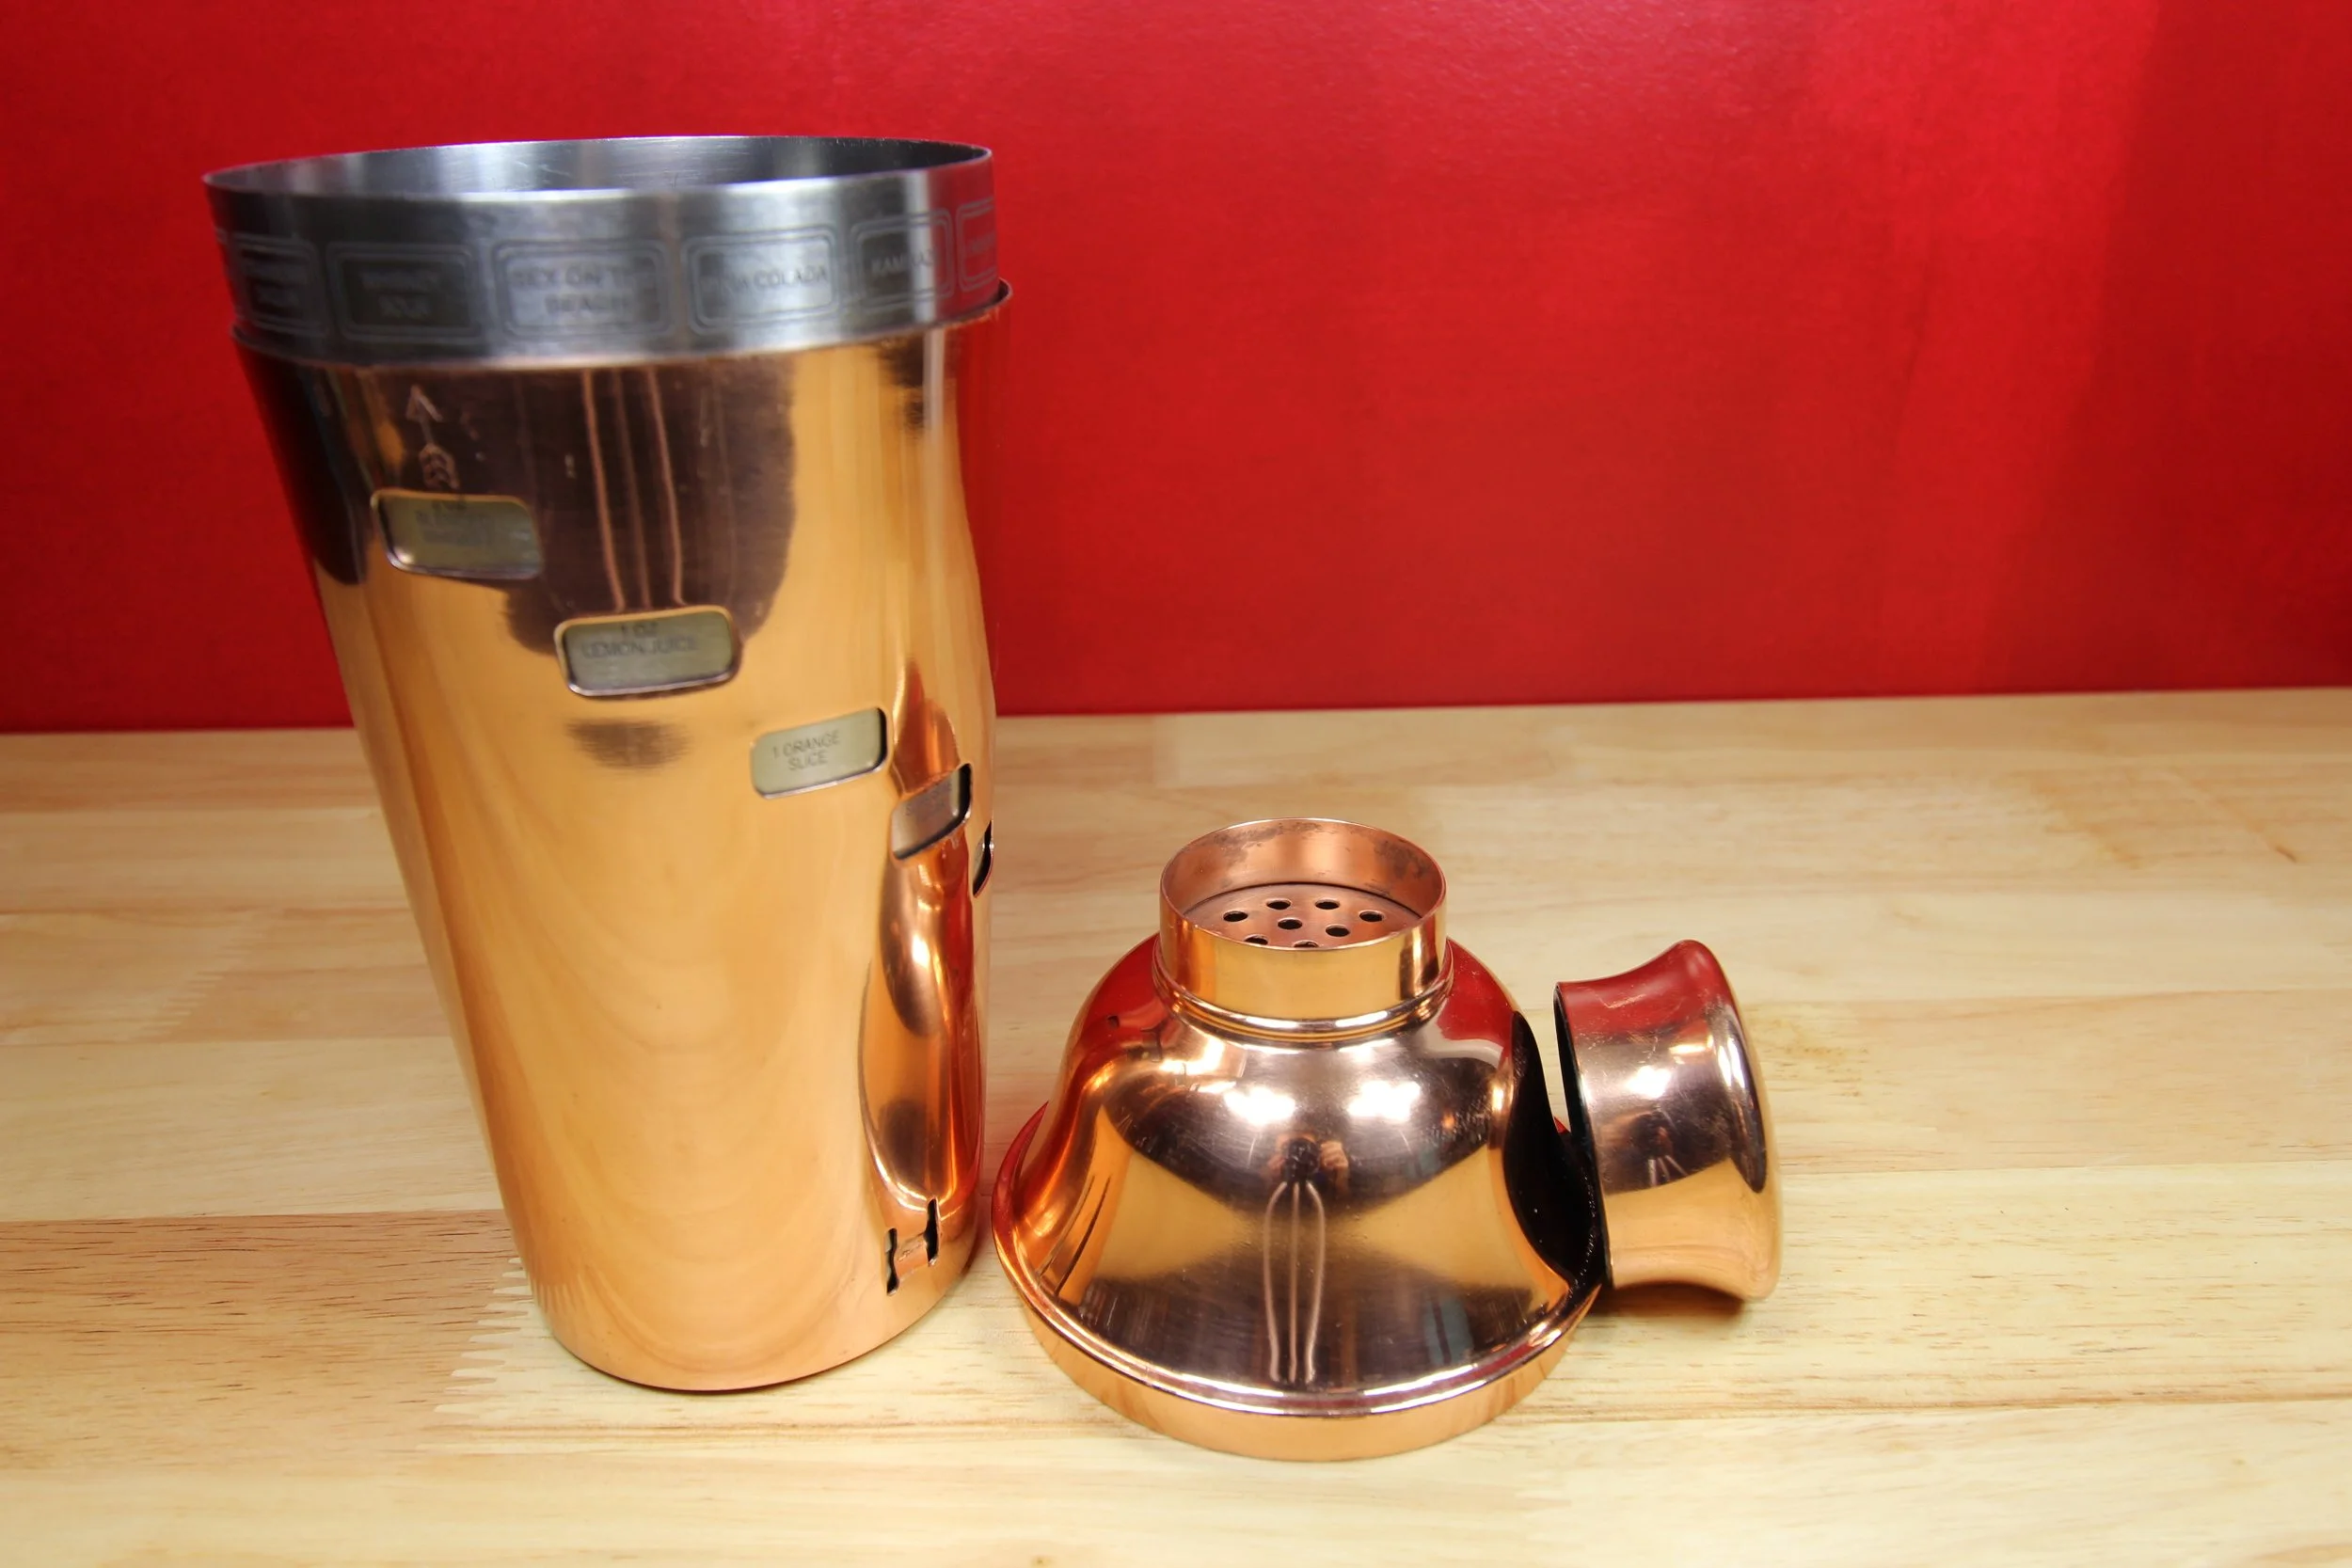
My Three Piece Shaker:
This is a more unique option for three piece shakers, it has a main vessel etched with recipes and an outer sleeve that rotates to show the ingredients for each drink.
My preference, a simple Boston Shaker
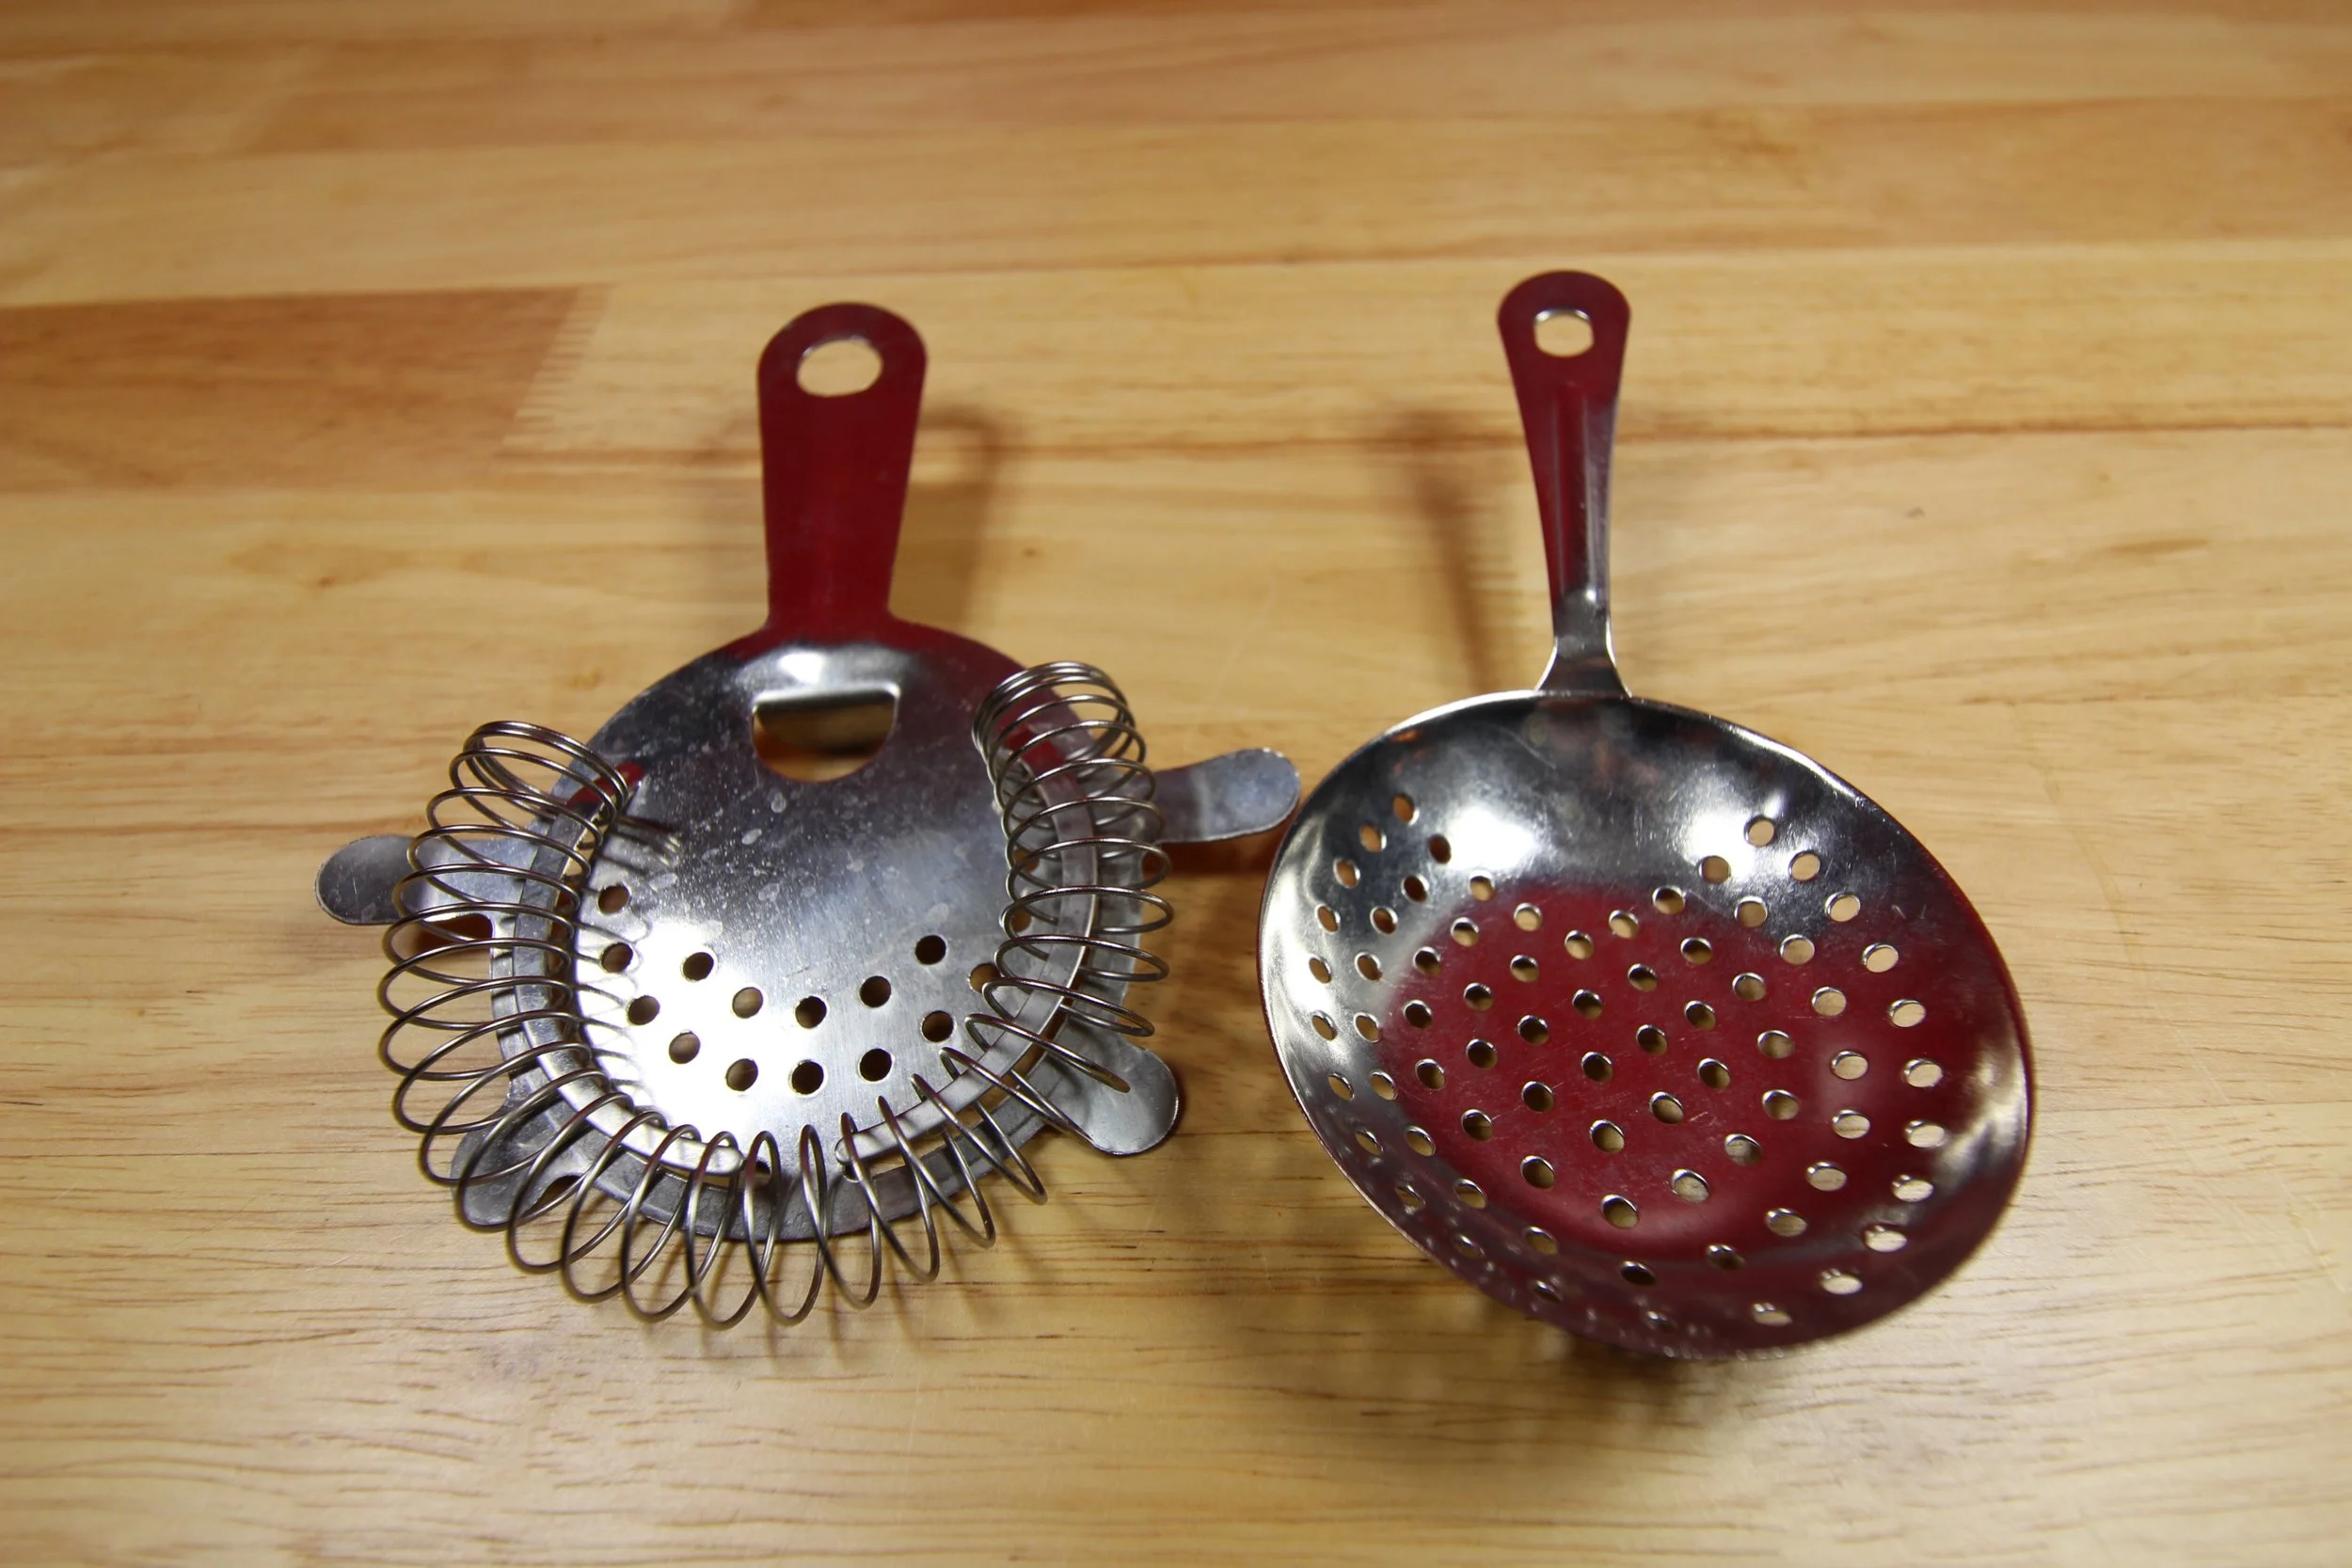
A Hawthorne Strainer (left), and a Julep Strainer (right).
On the topic of strainers; there are two primary forms of strainer that you will want to be familiar with. The Julep strainer is a simple one-piece strainer that is essentially a piece of metal with various holes punched in it. It will keep back large pieces of ice or other chunks that you may not desire to be left in a finished drink but will allow ice chips and smaller objects like pulp from fresh-squeezed juice to pass through. The Julep strainer is an elegant option that many bartenders prefer but it can take some time to develop a good method for it. The second type is a little bit more user-friendly and the option I largely prefer. It is known as a Hawthorne strainer and consists of a metal frame with a removable spring that helps fit the strainer to the vessel and can control the speed and volume of the pour. Like the Julep strainer, it will hold back larger items and allow smaller items to pass through.
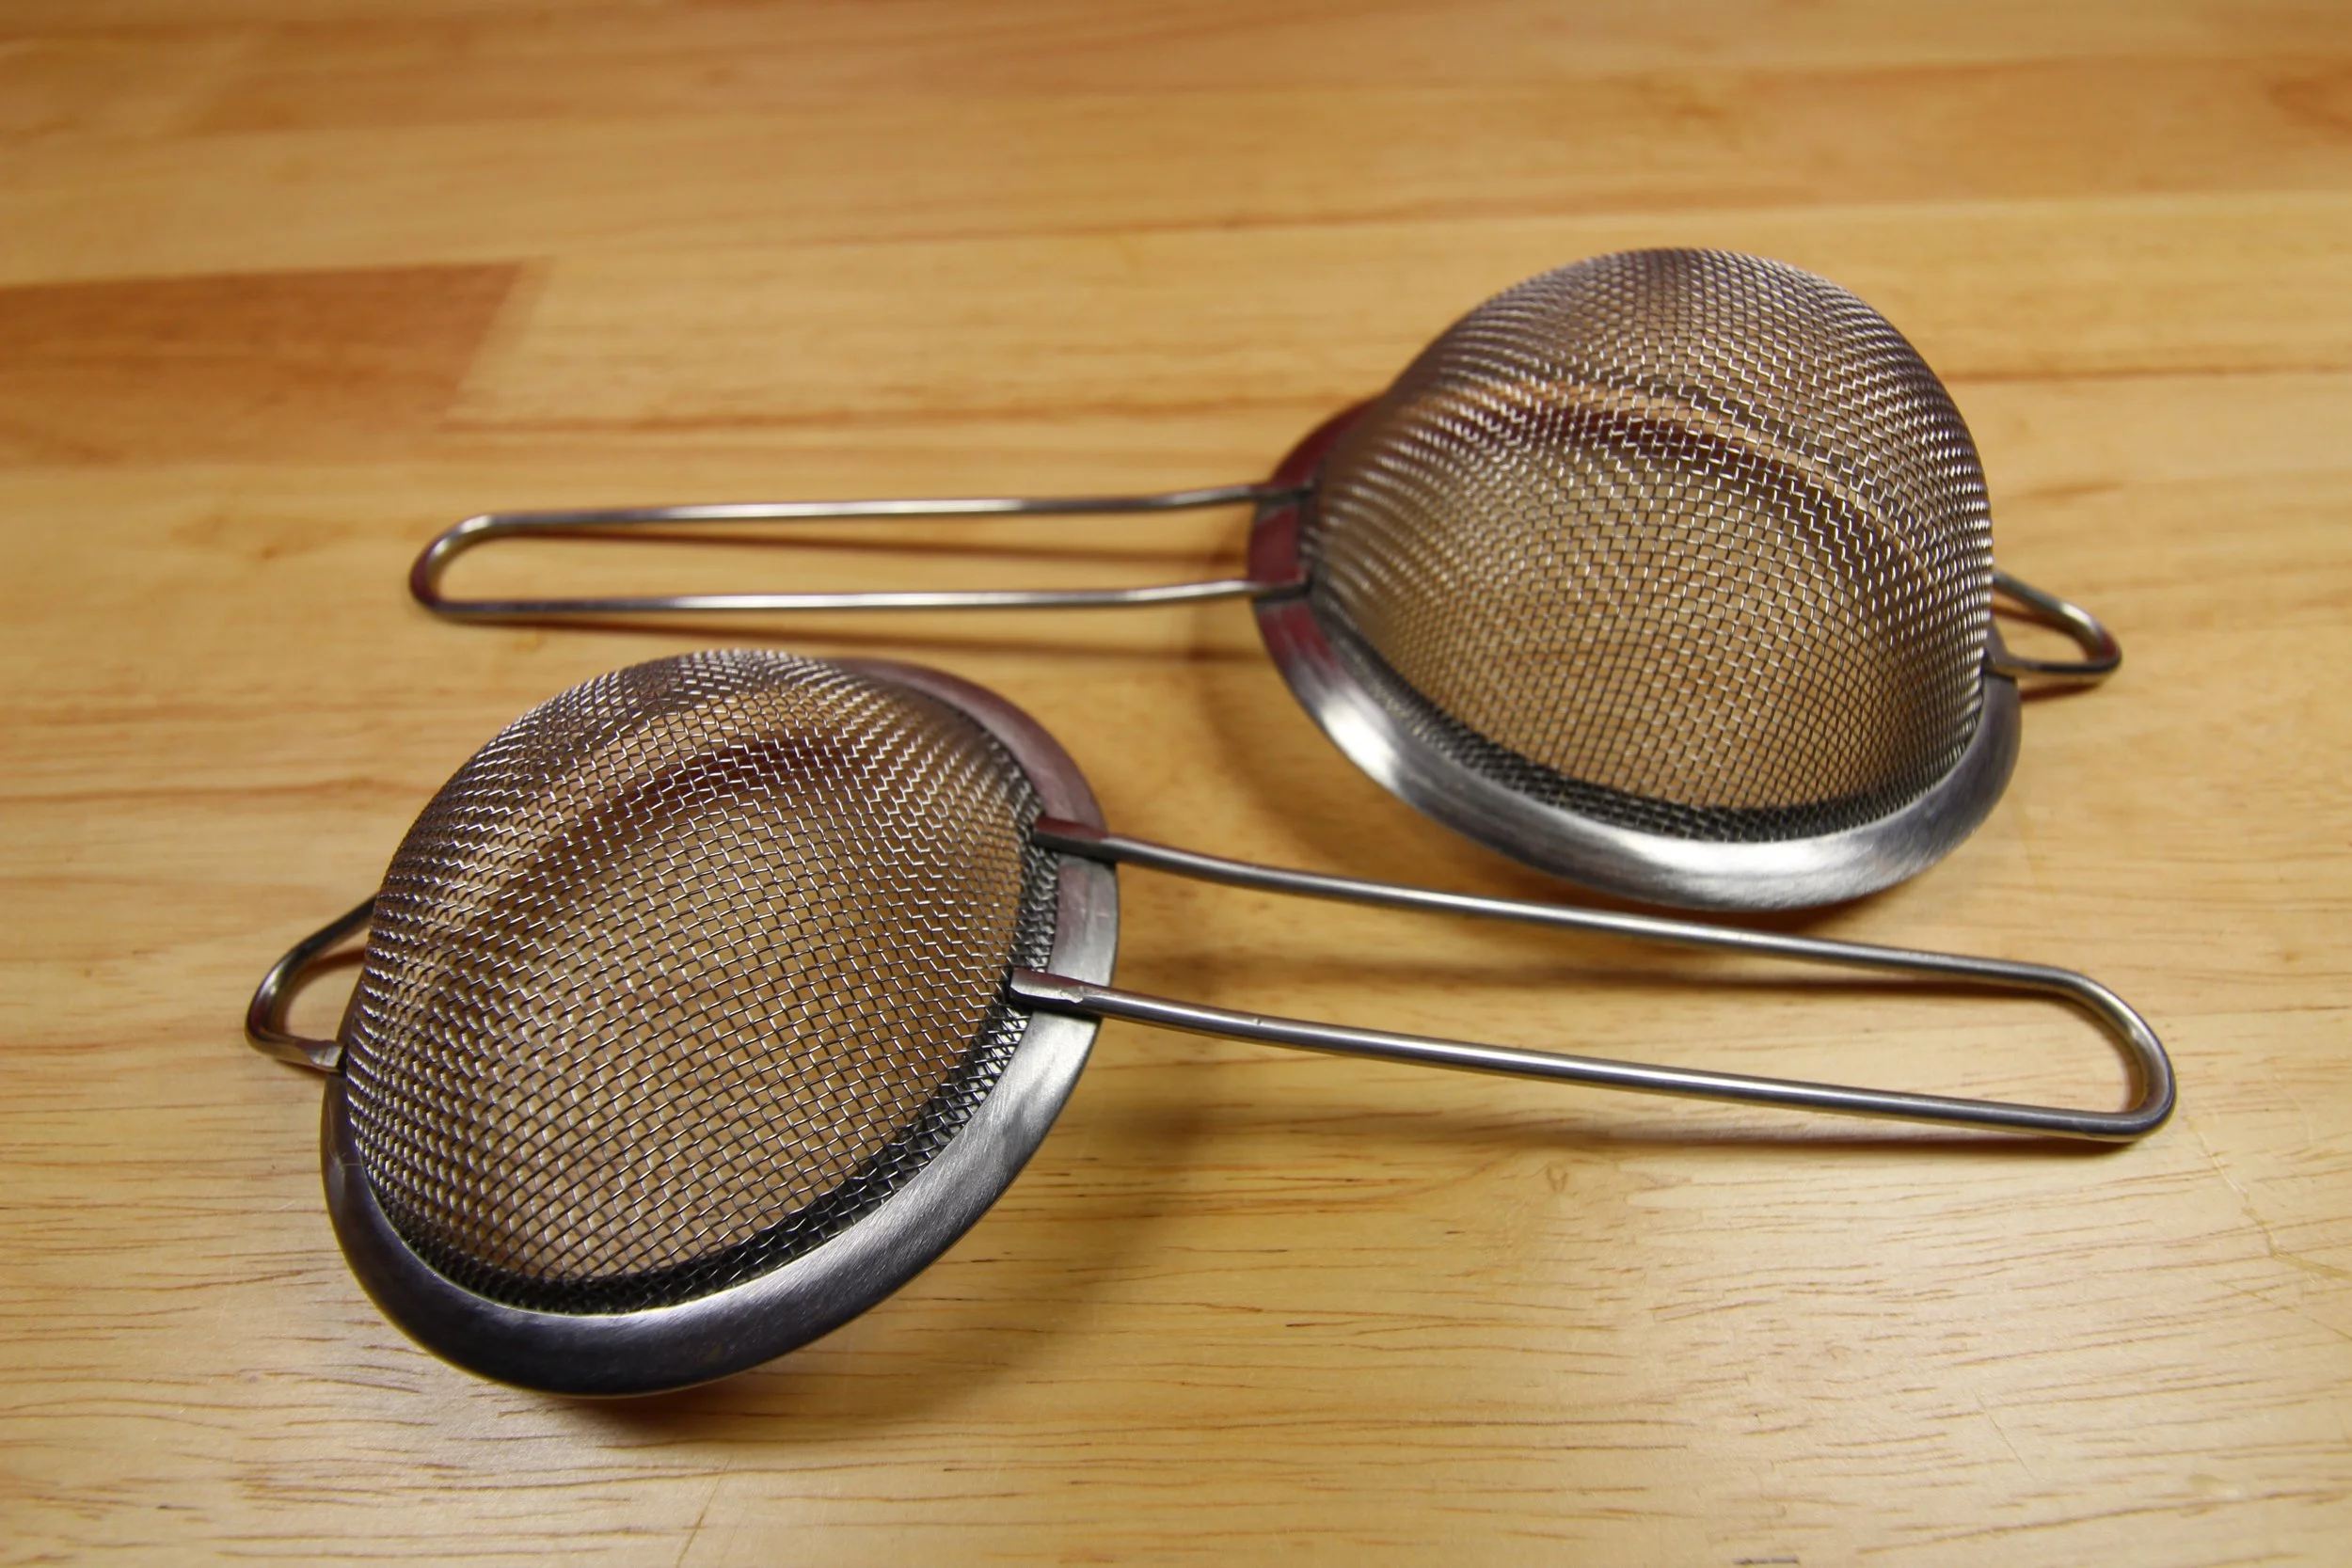
Two sizes of fine mesh strainers.
While not strictly necessary you may wish to consider picking up a small fine mesh sieve to double strain your cocktails. The benefit is that the sieve will remove the pulpy bits from fresh juice and the ice chips that will continue to water down a shaken cocktail. This isn’t critical for home bartending but it is a small expense that can really up your game with minimal effort.
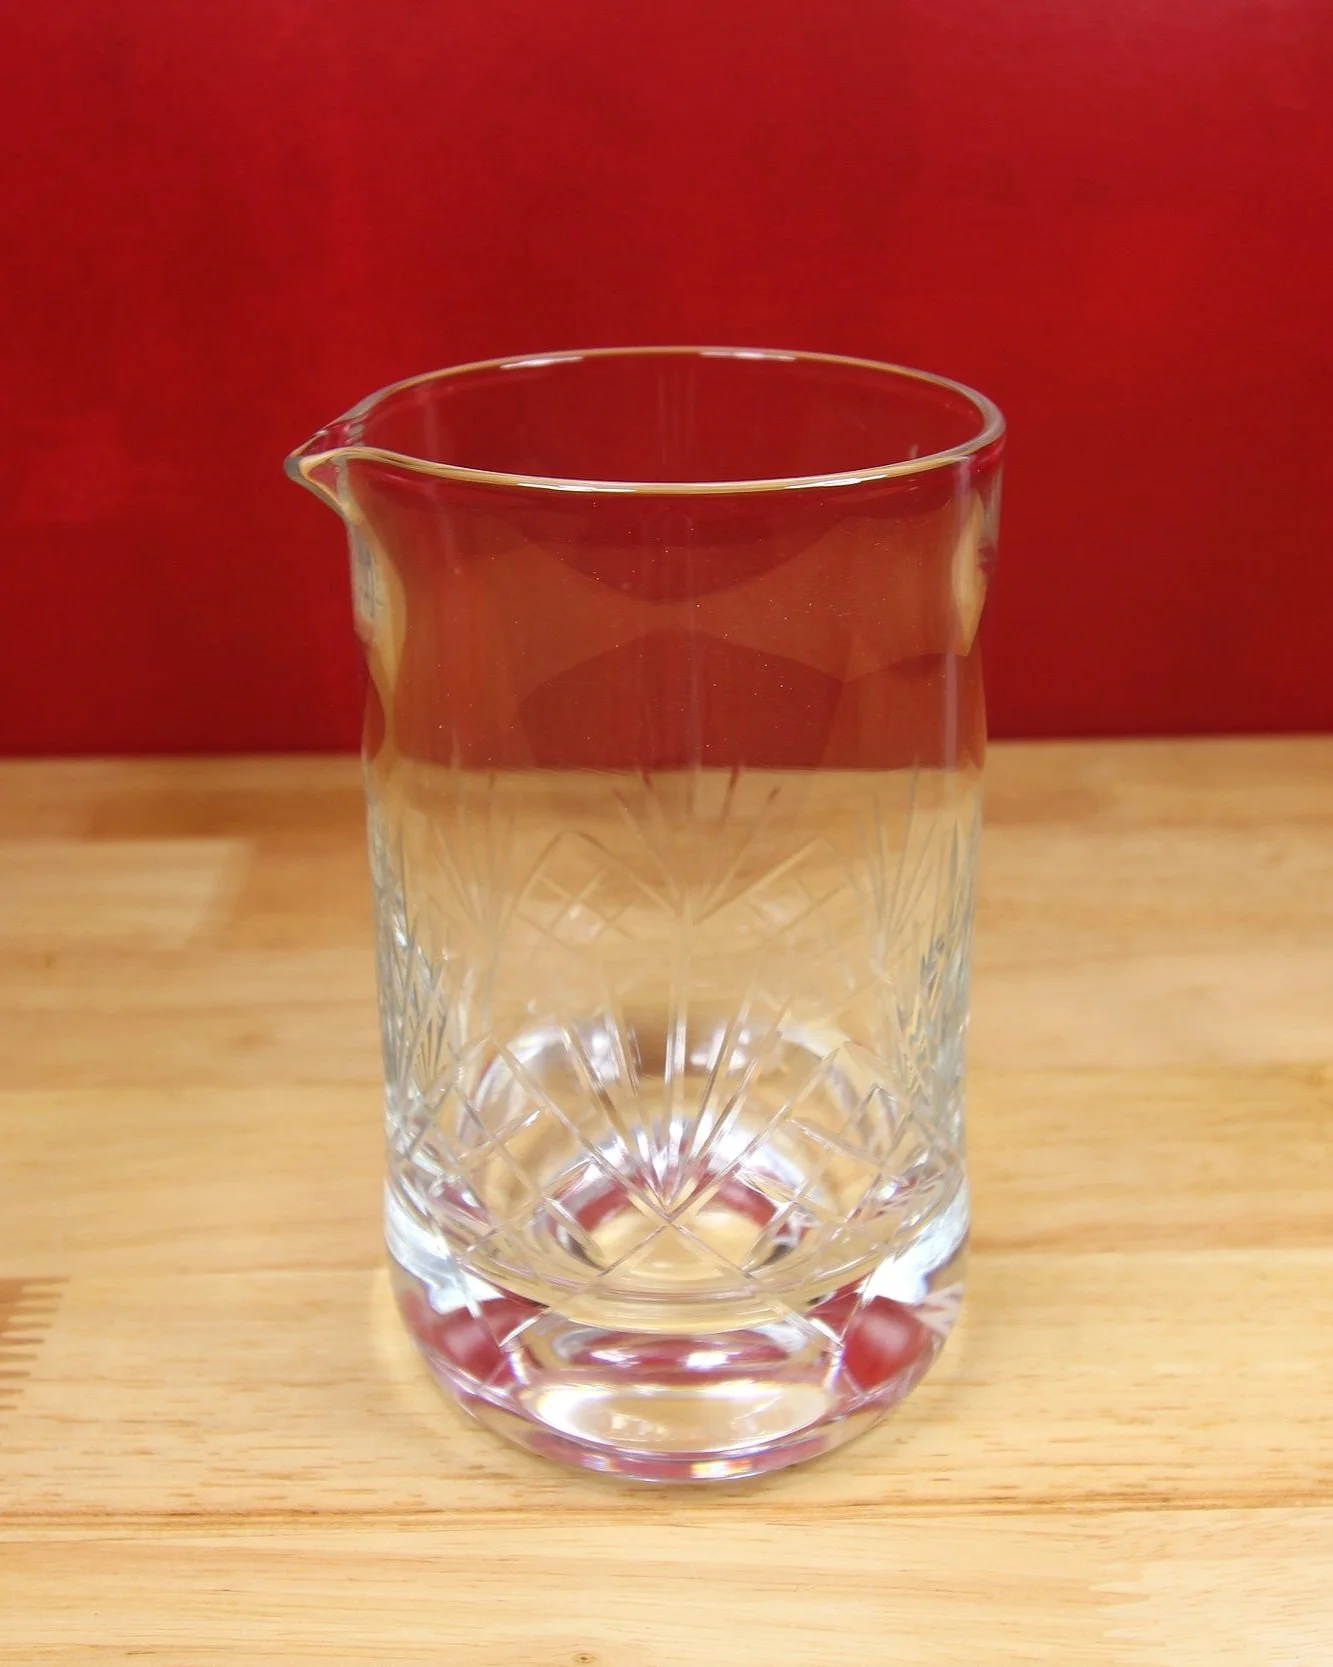
A classic mixing crystal glass
Note the pour spout and thick, weighted, base.
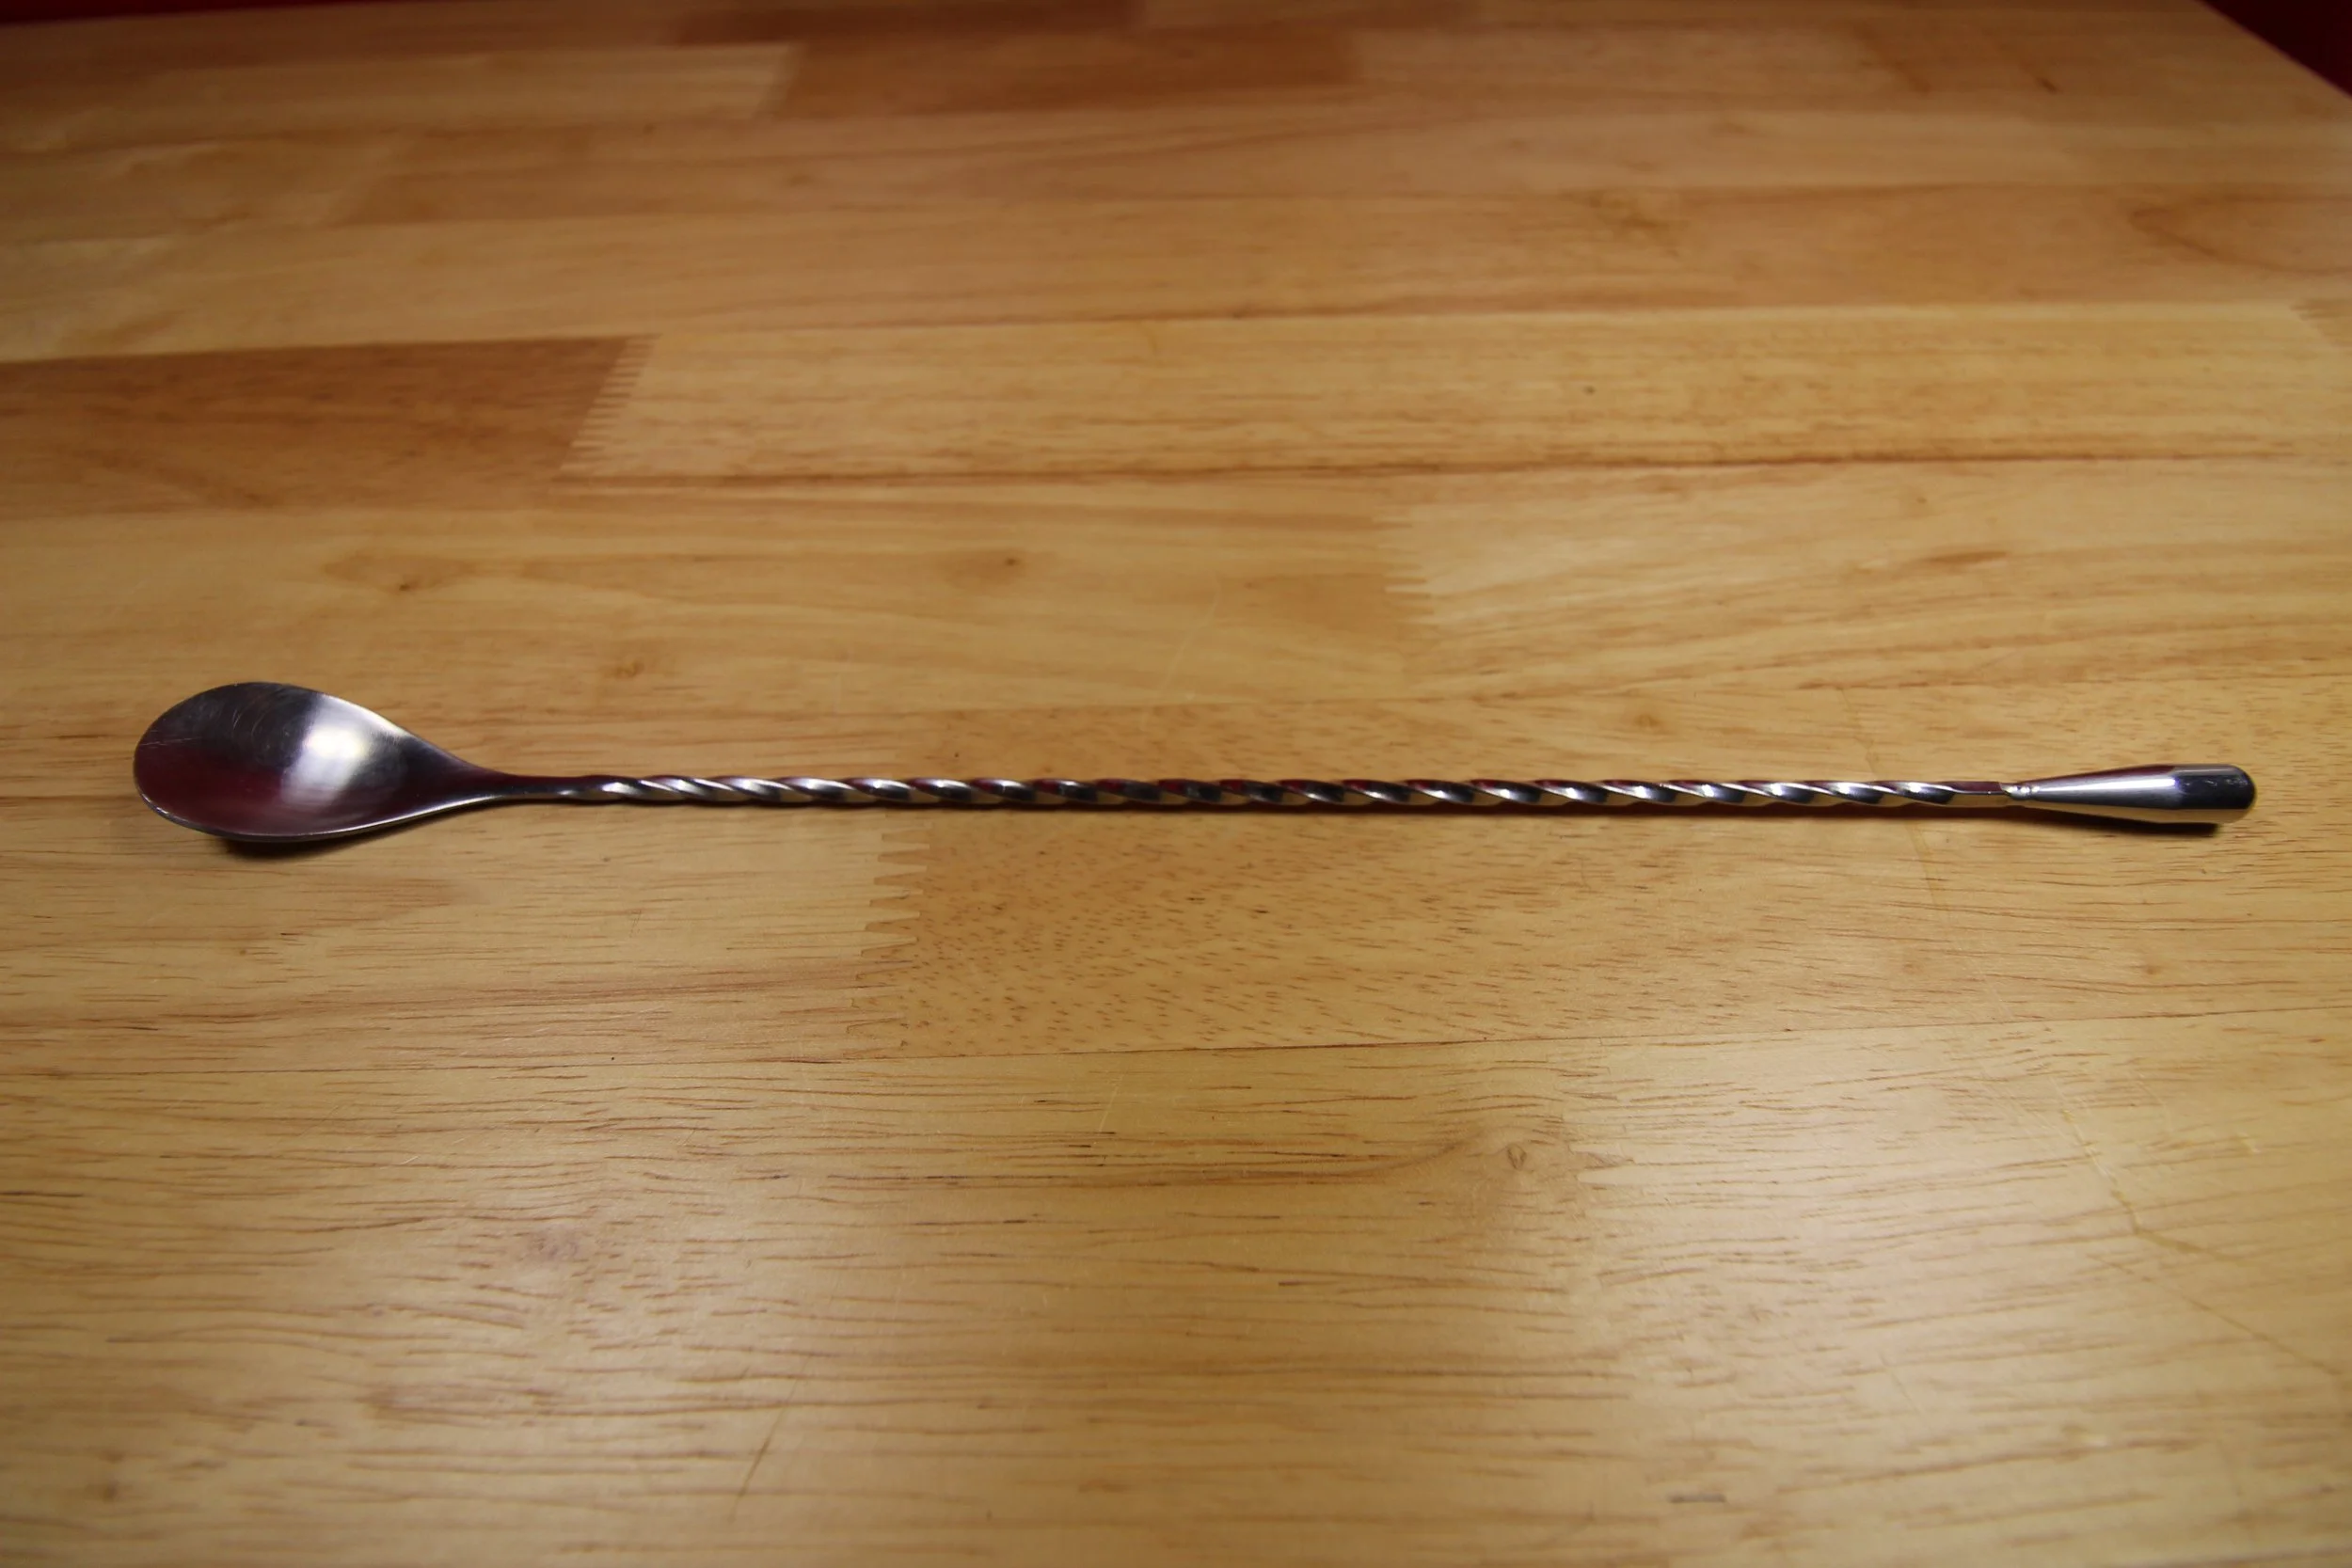
A typical bar spoon
Now that you have the means to shake and pour your cocktails you will also want to be able to stir some of your more delicate creations. For this, you can use your shaker or a pint glass or you can optionally purchase a dedicated mixing glass. A mixing glass is typically glass or crystal and often has an integral pour spout or lip. What you will definitely need, though, is a mixing or bar spoon. The spoon should have a bowl or paddle similar to a normal spoon, a twisted or corkscrew neck/handle/shaft as well as a weighted or flared swizzle end. The spoon itself is great for stirring, obviously, but is also best for fishing cherries or olives out of the jar without stabbing, crushing, or otherwise touching the item. The twisted neck helps foster good stirring technique and the swizzle end is best to use when stirring soda drinks or fizzes and can also be used to float various alcohols.
With everything at your disposal to mix a drink, you will need a vessel into which you can pour your creation. It is best to have some basic glassware on hand. You can evaluate what you need or want based on your preferred drinks but here are some of the basics that you might want to consider. For ease, you will want wine glasses, beer glasses, “up” glasses, and “down” glasses.
A modern wine glass,
note the large bowl that tapers to the top to concentrate the smell of the wine.
A very basic Champagne Flute
Most champagne flutes are only about 4 oz or so and would typically have a longer stems to avoid warming your chilled champagne but I prefer a sturdier glass.
For wine, you want to be able to accommodate at least 5 ounces, and if you would like you can differentiate between red and white style glasses. I will do a deep dive into the differences between various types of glassware in a future post so don’t worry too much about it right now. A small tangent, I have never had a more enjoyable glass of wine than a 5 euro bottle shared amongst friends in an apartment in Italy sipped out of small tumblers, “proper” glasses may enhance your enjoyment but they don’t define it. That being said you may want to include flutes for any sparkling options you may prefer or for some sparkling cocktails.
For beer glasses standard pint glasses are usually sufficient though you may want to have twelve-ounce tulip glasses on hand for yourself or a discerning friend.
A typical cocktail glass
You will more likely refer to this as a martini glass given how iconic the combination of the martini, olives, and cocktail glass has become but it is actually called a cocktail glass.
A simple Champagne Coupe
A nice alternative to both the champagne flute and the cocktail glass, a coupe is elegant and similar in volume but with a nice rim to help with sloshing liquid staying in the glass.
Regarding cocktail glassware, there are a number of different styles of “up” glass. Think of an “up” glass as any stemmed glass in which you would strain a cocktail, in simplest terms: stemmed glass with no ice. The most common, and arguably most prolific, up glass is the cocktail glass, commonly referred to as the “martini” glass. These are stylish and readily available in various sizes but are prone to spilling and can be fairly fragile. My preferred alternative is the coupe glass, often called a champagne coupe, it is similar in volume but the shape allows for safer sloshing.
A Double Old Fashioned Glass
This is the workhorse glass of the professional and home bar, suitable for anything that needs ice and viable for any strained drink you don’t put in an up glass
Note, this is not a rocks glass, though it is typically the glass you will use for drinks on the rocks.
For a “down” glass you will want to go with a classic old-fashioned glass (either single or double) which you may see being referred to as a rocks glass. This one glass will handle most classic cocktails and soda drinks if you do not wish to invest in additional glassware like a tumbler, highball, or Collins glass.
A true Rocks Glass
A true rocks glass is often utilized for mixed shots and can typically hold up to 3 - 4 oz of liquid, it is great for a single pour of liquor on the rocks.
My knock-off Glencairn Glass
In my opinion this is the ultimate tasting glass, it’s very sturdy, with a weighted foot, nice bowl to allow aroma diffusion and a nice taper to concentrate the aroma.
If you like shots at a party, invest in glasses that are 1 - 1.5 oz in volume for straight alcohols and glasses that are 2.5 - 3 oz in volume for mixed shots. For sipping drinks like higher-end whiskies, brandies, etc… you will want to invest in either true rocks glasses, snifters, or purpose-made glasses like Glencairn glasses (or the closest, most affordable clone of one).
My ceramic pairing knife and bamboo cutting board, I do recommend using a wooden cutting board despite it’s greater cost because bamboo is porous and will retain flavors so be conscientious of your choices.
The next important group of equipment centers around prepping garnishes and expressing fruit juice. For this you will you will want to have a high-quality wooden cutting board and at least a paring knife. If you enjoy, or use a lot of, larger fruits like grapefruit or want to incorporate fresh melon into your drinks or garnishes then it would be wise to invest in a longer knife as well. Optionally you could invest in small items like an apple corer/slicer and a melon baller but these are far from necessities.
A basic hand citrus press
A Bar Top Citrus Press
There are various versions of this, some which mount securely with hardware and others, like this one, that stick down with suction cups.
For juices, you will be best served by investing in a sturdy hand press. This will accommodate lemons, limes, and some oranges. If you frequently use larger oranges or grapefruits a bar-mounted citrus press may be worth the cost. I will, at this point, reiterate that a fine mesh sieve for juicing is a great way to catch pulp and small seeds to keep them out of a drink. If you plan on juicing a large amount of citrus at one time a decent-sized measuring cup, empty bottles, and funnel are also wise purchases.
Two options for peelers;
a straight peeler (top), and a y peeler (bottom). I generally prefer the y shaped peeler for safety and consistency.
A zester and spiral peeler
This can be used for much finer garnishes where a typical twist may not be desirable.
A selection of bar picks
Having a small variety can be nice for various cocktails
For garnishes other than wheels and wedges, you will want a peeler as a bare minimum necessity. You may want to invest in a spiral cutter and zester as well but they are less critical. A y-shaped peeler is best in my opinion, but use whatever shape/format you can handle most safely. This is also where you may want to invest in objects like bar picks, which can be as simple as bamboo picks available at your local grocery store or as fancy as stainless steel picks that match your general home decor. My preference is for reusable stainless steel but I also have a couple of promotional picks I have received over the years.
A waiter’s key or wine key
A waiter’s key is essential, it is compact, making it portable, and is also usable as a bottle opener.
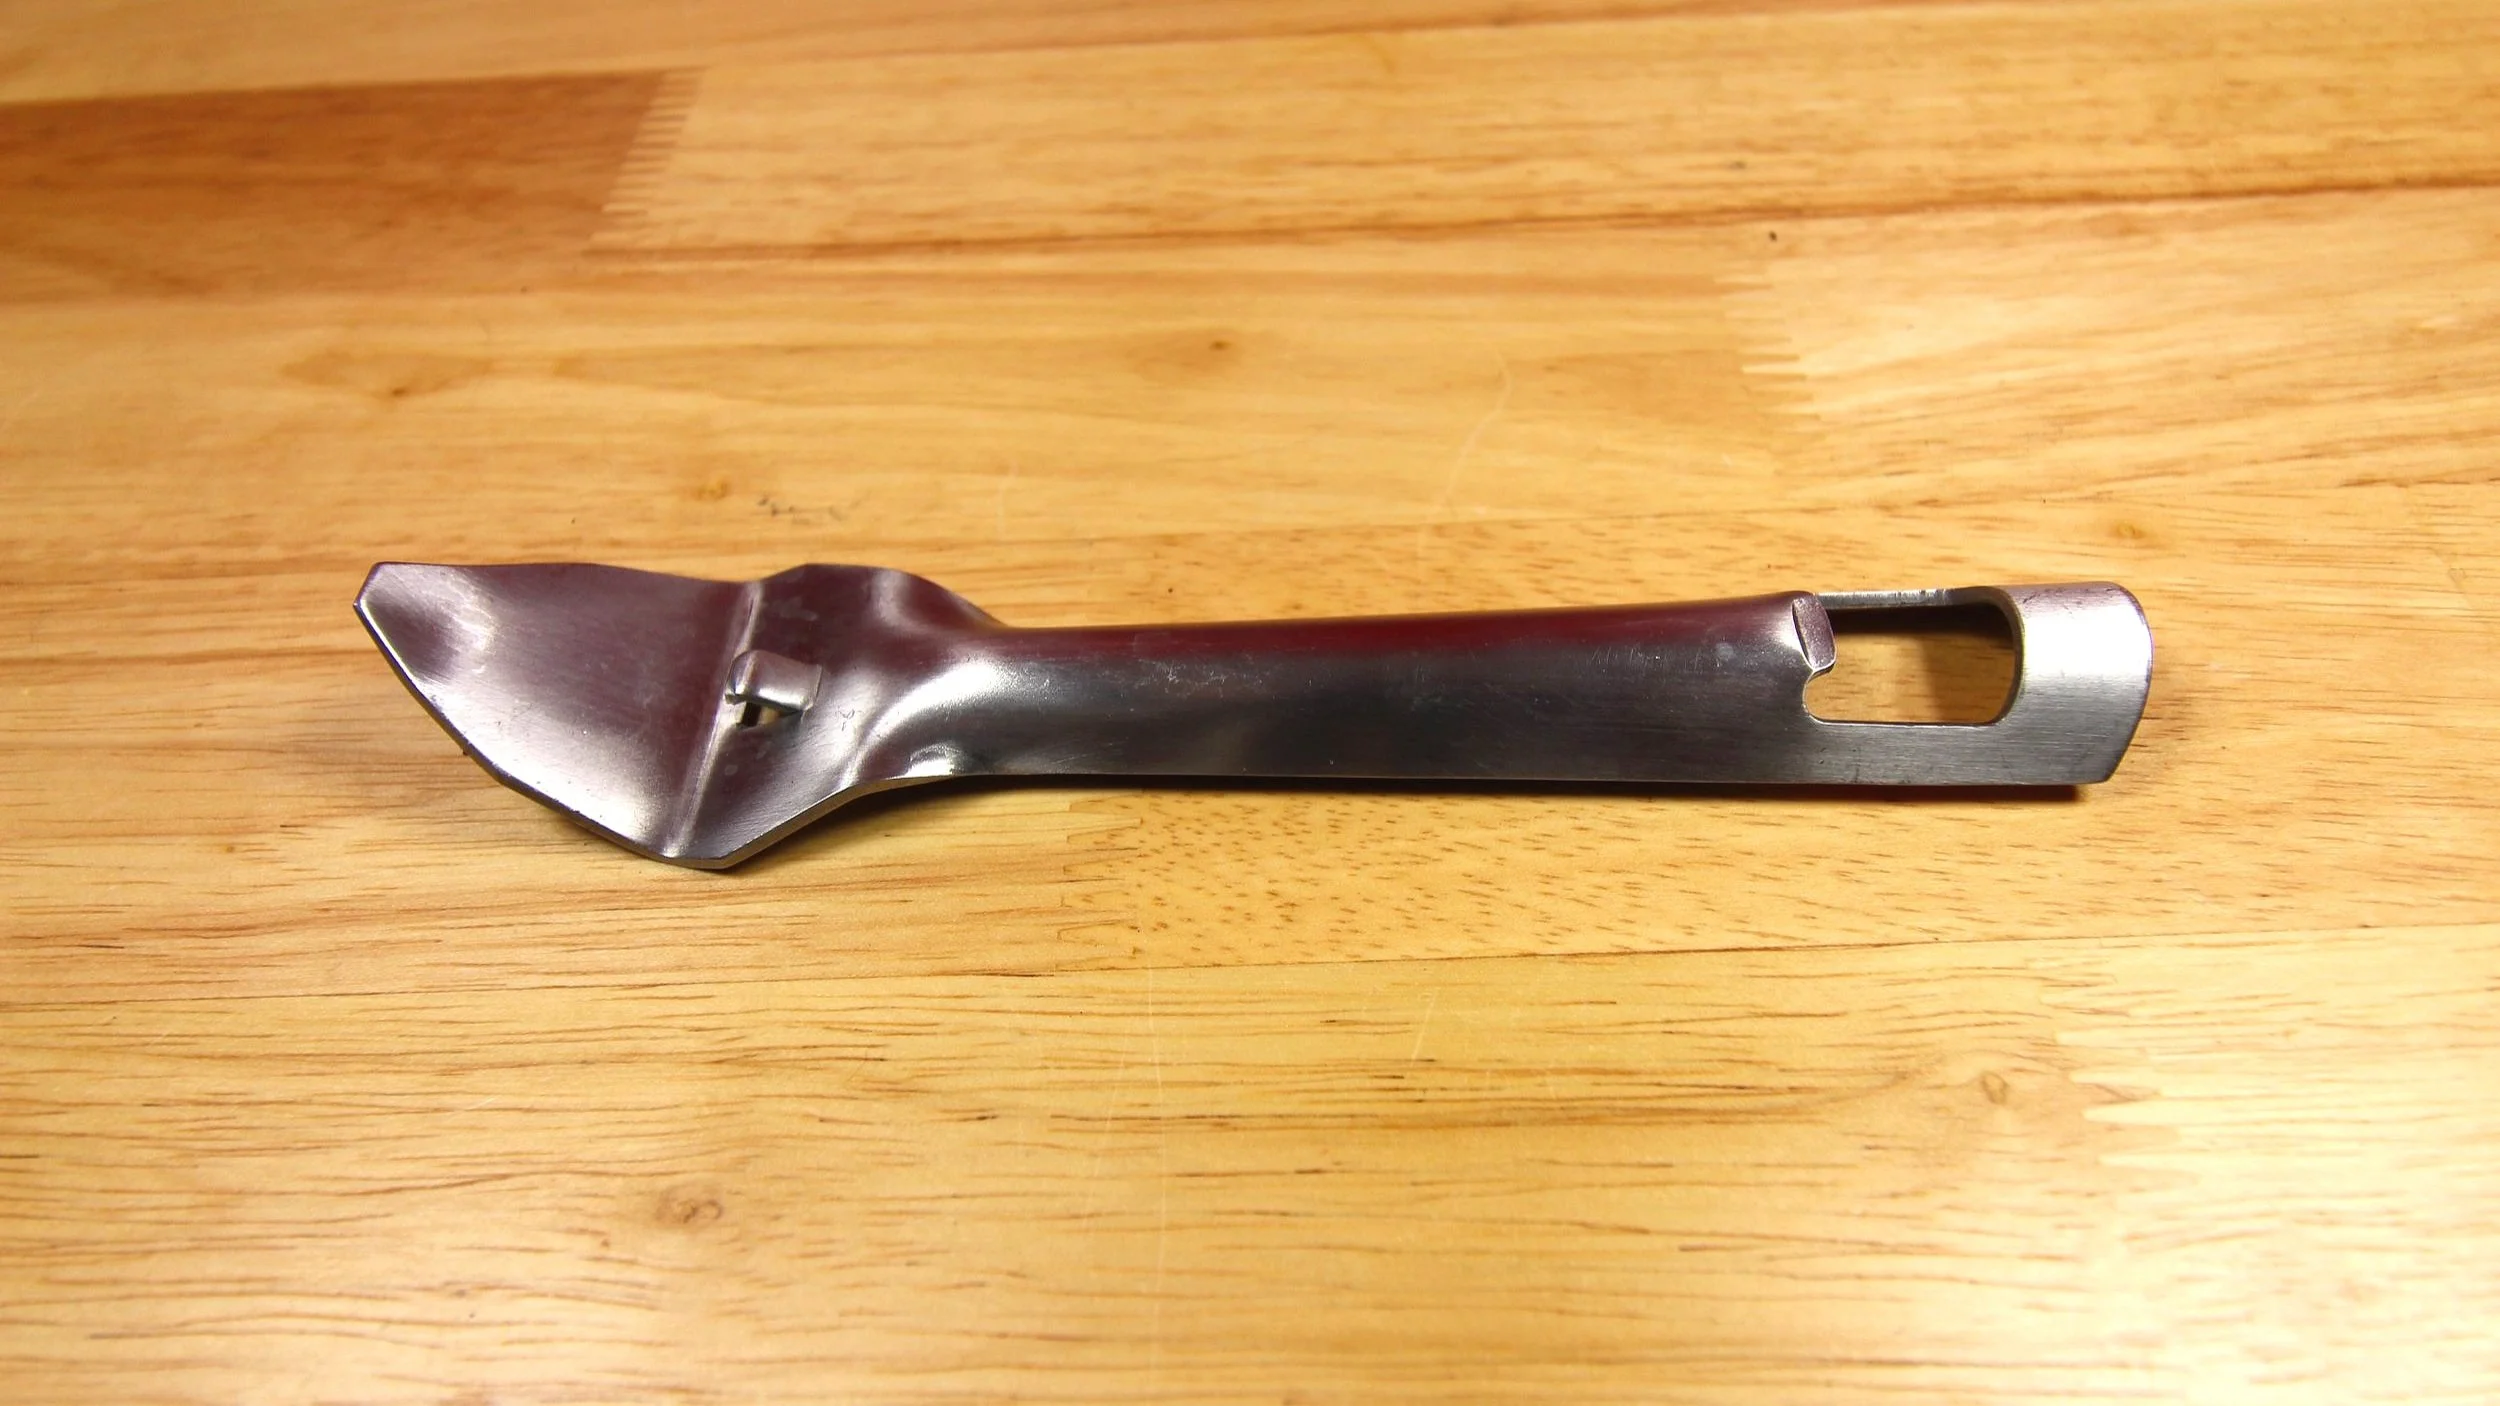
A very basic can opener
Ideally a can opener should have a sharp tip to pierce metals and should be on the smaller end to work with any can type. Notice that this one also has in integral bottle opener.
Last but not least there are some miscellaneous items that you will probably want to have. If your freezer does not have an integrated ice machine then trays are a must. Even if your freezer does have an ice maker, the use of large-format ice trays for cocktails or straight pours on the rocks is a worthwhile investment. A high-quality wine key is also essential, because in addition to opening wine bottles most double as a beer bottle opener. If you use canned juices like pineapple or other tropical juices for tiki drinks a simple can opener cannot be overlooked.
That is all of the most basic equipment that you need to set up your home bar. It may seem like a lot but keep in mind that many of the items can be found inexpensively and there are numerous home supply companies and stores that sell kits with many of the essentials bundled together. Many of the items can be cross-functional as well so your kitchen may already have some of what you need. Additionally, keep an eye out for multi-function items such as a zester with a spiral peeler, this one, in particular, is quite common.
My fully assembled bar cart, including a few additional items that make my life easier like a bar mat, bar mop, and napkin caddy.
I hope that this information is helpful in getting you started on your home bar journey. In the next post, we will discuss basic bar stocking from alcohol to fruit and mixers. In the meantime; thank you for reading and drink responsibly.


